Sunday 29 March 2015

Session 8 - The Road to Brinewall

As Shadow approached the Twilight Academy, the whole building seemed to be rocked by an explosion, as one of the walls exploded out into bits.  Out of the dust and bits of wall pieces a giant flying ghostly shark appears.


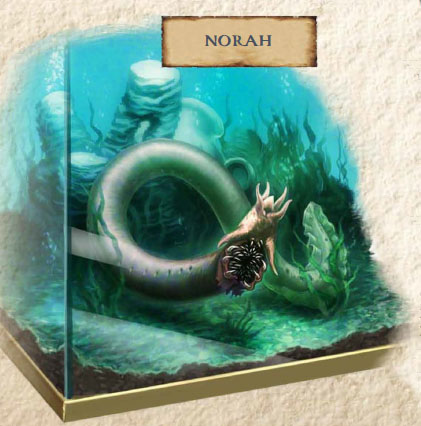
Shadow manages to fire off an arrow that she's set on fire and hits the ghost shark.  It seems unconcerned.  It just flies about.  It steals someones hat and eats it.  It seems pretty aggressive.  People are panicking and running around.  A young child pops out of the rubble of the Academy and watches the havoc as it's going down.

The rest of the party finally arrives after having heard the commotion, and we defeat the shark.  As it disappears in a puff of magical energy, the kid runs over and thanks us.  The shark was a magical construct that he had been working on for a school project, and it had gotten out of control.  As he's explaining this to us a woman comes out of the school in a blue dress with bright red hair.


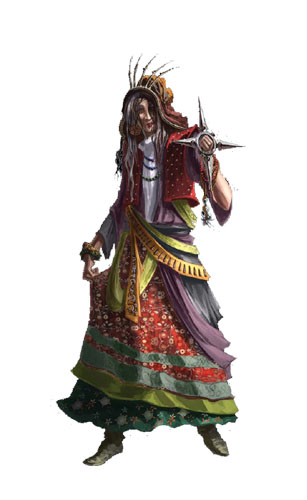
She explains that at the Twilight Academy they encourage creativity amongst their students, although they don't typically have problems get out of hand quite like this.  Another student had been working on an anti-magic field for gladiatorial combat, and there had been some side effects which had lead to the shark being able to escape.  She thanks us profusely and asks us to wait a few minutes while she rounds up a suitable reward for us.  She returns a few minutes later with a small leather bag with some coins in it and a big green gem.  She tells us that she knows the gem is magic of some sort, but she hasn't yet been able to pin down exactly what it does.  She offers it to us in hopes that we can figure it out.  We accept and move on.


The townspeople seem a little shook up.  This kind of event must be fairly unusual in order to cause such a disturbance among them.  We decide to head over to the pub in town for a bit of food and to catch up on the local gossip.  We ask the barkeep about Brinewall Castle.  He tells us that people around here tend to assume the castle is haunted.  They've heard stories that the last few groups of people who went there never came back.

After dinner, as we're sitting in the pub, we notice that the town's Sheriff is in the pub as well.  We decide to have a chat with him too.  Sula tries to win him over with her womanly charms and it works reasonably well.  We ask him if this kind of trouble from the Academy is common.  He tells us that it really isn't.  They're a little bit unusual, and nobody's really sure what goes on inside the walls, but they tend to keep to themselves.  Plus they pay the town to be allowed to operate here, so in general it tends to be worthwhile to have them around.  We ask him if he knows anything about Brinewall Castle, and he tells us the same story as the barkeep.  He figures it's haunted as well.

We bid the Sheriff a good night and decide that maybe we should go ask the woman in charge of the Academy if she's heard anything about Brinewall.  The Academy might have different lines of communication and she might have some ideas that we haven't heard yet.  So we head back over there.


Knowing that the red haired lady is the head of a magic school, Bukka decides to take his turn at trying to impress her with some magic.  Unfortunately, create water gets more laughter than respect, but she still agrees to let us in and have a chat.  She doesn't know anything about either Brinewall Castle, or ghosts in general.  She suspects that there may not even be ghosts.  She thinks people are just superstitious, and combined with the fact that some travelers have gone there and not returned, it makes for an excellent scary story to feed their superstition.

Once we find out that she ultimately can't offer us any real help, we thank her for her time and go on.  We head back to the pub and celebrate saving the town with a few drinks before heading back to the caravan for the night.


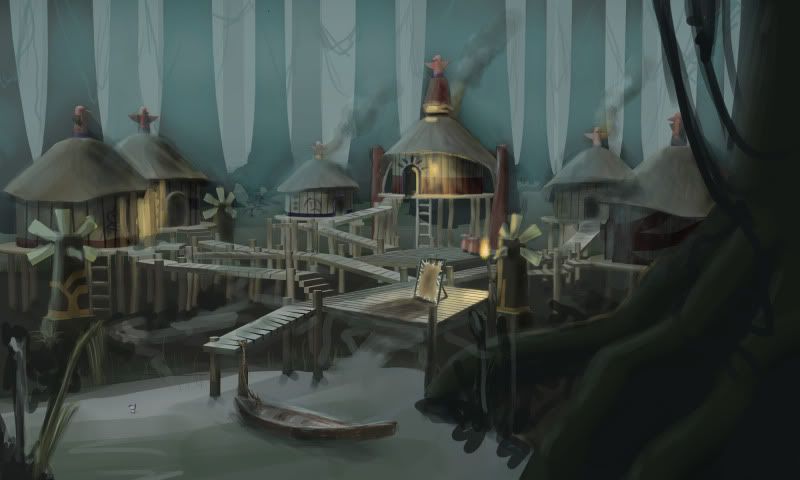
The next day we leave Galduria and head off along the road to Brinewall.  We travel all day and reach the town of Wolf's Ear.


Once again, we head to the local tavern to get the local gossip.  Nothing of real note has happened lately.  There was another caravan that passed through recently heading South, but that's pretty routine.  This is mostly just a simple hunting and tanning village.

We specifically ask the barkeep about Brinewall.  He says he doesn't know much about it.  It's a good long way North of here, and the further North you go, the less animals and more ogres there are.  So it's not as profitable for hunters to head up that way.  Once the castle stopped being a major trade point caravans slowed down from up there, and so did the news.  The barkeep says if we want to know more about the area around town, we'd be better off asking one of the hunters, as they spend more time in the woods.  He says we'd do well to seek out a man named Cletus, and tells us where to find him.

We wander through town to where the barkeep told us to find Cletus, and find him practicing some archery.  We sneak up quietly near him, and Shadow splits one of his arrows in his practice target.  He's a little surprised by the arrow flying in past him out of nowhere, but once he sees where the shot landed, he's pretty impressed.


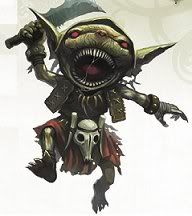
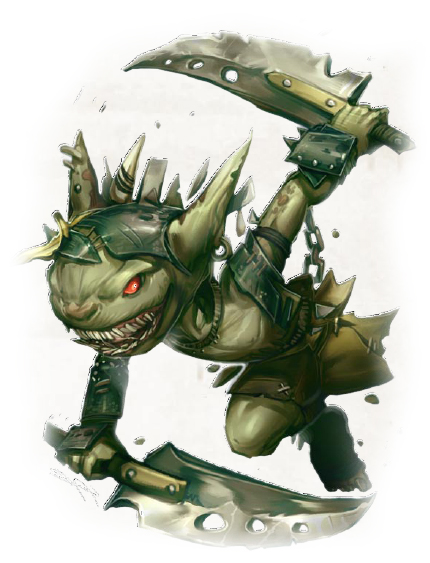
We ask him the same kinds of questions.  He says he's never been to Brinewall personally, there's no meat on ghosts, so he doesn't figure it'd be a worthwhile trip.  He is able to tell us about some patrols of ogres and goblins that have been in the woods outside of town though, which we figure will be helpful on our trip either way.

After talking to Cletus for a while, he finishes up his archery practice, and decides to head to the pub for a drink.  Sula goes with him to see if she can get any more information out of him, and the rest of us head back to the caravan for the night.


We get up the next morning and get ready to head out, but Sula is nowhere to be found.  We head back to the pub and find out that she had had some drinks and left with Cletus last night.  Once we collect her, we head out of town.

A few days of travel pass uneventfully.  Because of the places Cletus told us to avoid we don't run into any trouble.  Then we reach Roderic's Cove.


Sandru tells us that Roderic's Cove is a smaller town, but because it's also a port, there is a fair amount of trade that goes on here.  It's a little bit piratey, but nowhere near the extent that Riddleport to the North is.  Sandru tells us that he'd just as soon avoid Riddleport if we don't have to go there, and he recommends that if we have any sales or trades to make, Roderic's Cove might be a good place to do that.


We spend a good part of the afternoon trading and bartering with the locals for some of the trade goods we had stored on the caravan.  Around supper time we head to a pub for the typical grub and gab.  The bartender tells us about the path to the North.  There's really two paths, one that goes to Riddleport and one that doesn't.  He says many people he talks to prefer to avoid Riddleport, and that's often why they're in Roderic's Cove.  So the path that skips Riddleport is fairly well known.  The barkeep doesn't know anything about ghosts, so we head back to the caravan for the night.

Sula and Qunna teach Kapo to dance while we all relax around the fire before we call it a night.


Once again, we pack up the caravan and get moving.  We pass through the mountains as we skirt Riddleport, and on the second day of travel we meet another caravan heading South.

They've just come from a successful trade trip to the Elven city of Celwynvian to the West.  They say that the elves typically keep to themselves and aren't always welcoming of visitors, but if you can convince them to talk to you it can often be a worthwhile trade stop, because they produce some beautiful carvings and fabrics and the like.


We do a little bit of trade with them, they take some of our stuff, and we get some of the elven stuff they've just picked up.  We ask them if they've been as far North as Brinewall, but they say they don't go there.  There's no trade to be had, so why bother.  They mention that they saw some ogres on their way South, and tell us roughly where to avoid.

Once they pass we carry on.  We travel uneventfully for 6 more days without passing through any other major settlements.  We spend our evenings camping around the caravan.


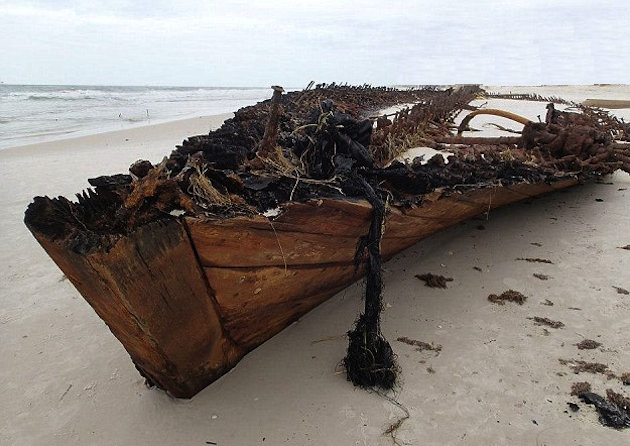
On the 6th day, we arrive in the area of Brinewall.


The caravan path doesn't lead directly to the castle.  We've got to leave the caravan and walk into the castle itself.  We decide that the drivers for the caravan will stay with the caravan, and the rest of us will all walk in.  As we've arrived up, Ameiko seems to be a little listless.  She says she's just a little tired, and it's still midday so we decide to push on to the castle.

We start walking in, but not far from the caravan, Ameiko collapses.  Sandru carries her back to the caravan, and we go with them.  She's mumbling a little bit.  She says in Tien "Beware the earthbound ones longing for the sky."  When we get back to the caravan, we've surmised that there's some kind of magical force keeping her unconscious, but we can't seem to do anything about it.  She's still mumbling, and she says "He holds half the key in 10 hands."

Unsure what to do, we decide to move the caravan back the way we came: away from the castle.  When we do that, Ameiko starts screaming and seizing.  We quickly head back towards the castle, and she seems to settle down.  Sandru, Koya, and Shalelu decide they'll stay with Ameiko to keep her safe, and the rest of us will go investigate the castle to see if we can find the source of her problems.

Sunday 22 March 2015

Session 7 - Caravan

We wake up in the morning to a bit of a commotion going on around the caravan.  Ameiko and Sandru are excitedly talking and making plans.  Once we all get up and about, Ameiko tells us that we gave her a lot to think about last night.  She's decided that she's really curious about learning her family's history, and she's planning to head up to Brinewall Castle to investigate the secret third vault mentioned in her grandfather's letter.

Ameiko has recruited some of her friends to come with her on her journey.  So far, there group consists of Ameiko Kaijitsu herself, Sandru Vhiski, Shaleleu Andosana, and Koya Mvashti.


Sandru has kindly agreed to lend her the use of his caravan to travel up to Brinewall Castle.  Ameiko tells us that they were originally planning to hire a few people from town to travel with them as protection, but after seeing how we handled ourselves with the goblins, she thought maybe we'd be willing to travel with her.

She explains that she's going to put 2000g of her own money into the caravan to help get it ready for the journey with the larger crew.  And she's willing to pay us 500g because she knows this could potentially be dangerous, and we might need to get some equipment for ourselves to get ready for the trip as well.

We talk it over briefly and decide that we're up for some adventure.  Ameiko is quite pleased.  She says it will take 3 or 4 days to stock up on supplies and get the necessary repairs made to the caravan.  In that time we should get ourselves ready as well.

We spend a few days bumming around town.  Sell some of the loot that we found in the marsh, and pick up some new gear.  We spend some time drinking at the local haunts.  One evening, we pay a visit to The Hagfish, a local tavern known for the slimy hagfish behind the bar named Norah.  There's a standing wager that anyone who can stomach a whole glass of the slime, wins a bag of coins behind the bar.  Shadow has a few drinks and decides to take the challenge and is successful!  Much partying ensues.


Another couple days pass and Ameiko lets us know that the caravan will be heading out in the morning.  We spend that night at the caravan and we all leave in the morning.

The caravan itself now consists of 2 covered wagons, a fortune teller's wagon, and a supply wagon.  Once everyone is aboard, we set off towards Brinewall Castle.


Our first stop is in Galduria, which is around 3 days travel to the North of Sandpoint.  The three days of travel pass uneventfully.


As we make the final approach into town, we pass another caravan heading South towards Sandpoint.  They've just come from Riddleport, a notorious pirate city further North.  We ask them some questions, and they say that yes, it's generally pretty sketchy, but that if you have some guards, you can typically find some pretty good deals in the city.  They give us some tips about some ogres they passed between Riddleport and Galduria, and how they figure we would best avoid them, and then head on their way.

We pull into Galduria.  It's mainly a small fishing town.  Ameiko heads into town to restock some supplies for the caravan.  We find out that Galduria does have one particularly interesting building, it's the Twilight Academy.  It's a mage's training Academy.  It was founded out here to try to avoid the influence of Magnimar and Korvosa.  Shadow decides to head over and see what's going on at the Academy.  As she approaches, one of the walls rocks with an explosion and bits of wall fly everywhere.

Sunday 1 March 2015

Session 6 - The Soggy River Monster

We leave the cave and row the boat back towards Walthus' place.  Even though we found it at Megus' shack, we figure maybe Walthus' will find better use for it.  On the way, we stop by the goblin camp and pick up the other chest.

Once we're well on our way, we hear screaming coming from the marsh somewhere off the shore a bit.  We decide to row ashore and investigate the source of the screams.  We sneak through the marsh and eventually see a disgusting looking monstrosity dragging a screaming goblin towards a small stanky looking hut made of mud and logs.  The monster has the same creepy glowing red eyes that we saw staring at us from the swamp the other day.  We figure this is probably the Soggy River Monster.


We realize pretty quickly that this is the same goblin that we interrogated and then dumped over the camp wall.  Feeling mildly bad about that, we approach to intervene.  As we do, the monster notices us and starts to attack us as well.  We beat it to a manageable amount, and then the goblin surprises everyone by jumping in and landing the killing blow.  It busts out sobbing and mumbling to itself that it was going to be eaten.


Qunna starts talking to it to try to calm it down.  She eventually finds out that her name is Kapo Firestink, and she's terrified.  We offer to protect her, and she agrees.  Sula asks if we can have her ears, to which she reacts fairly negatively.  Qunna calms her down again and keeps her occupied for a few minutes.

We look around the hut the creature created.  It's a very basic hut made from logs and mud and various other garbage that it seems to have found around the marsh.


We poke our heads inside and it's filled with scraps of tattered clothing, gory animal bones, monster waste, and some suspicious mud covered spheres.  We pick up one of the spheres, and it turns out they're human heads that have been covered in mud and gunk.  We're fairly confident that this would be the other party of adventurers that the Sheriff mentioned had gone missing recently.

Unfortunately, we don't have the space to carry back all of the heads and bits of clothing and other remains.  Sula has the smart idea to sketch the faces from the heads on some paper so that we can help to identify the missing people.  Unfortunately, as it turns out, Sula isn't a fantastic artist, and neither are any of the rest of us, so we don't really notice that her drawings aren't very accurate.


Since we aren't exactly sure what waits for us in the town, we decide to carve some trail markers on trees on our way back to the main path, so that any villagers who come down looking for the remains will be able to find their way to the hut easier.


Once we're done with that, we row and trudge the rest of the way back to town, new goblin friend in tow.  As we travel, Qunna attempts to teach the goblin some basics in common so that we can talk to it a little easier.

Arriving at the outskirts of town, we realize that it may not be wise to bring a goblin into a populated area.  While the townsfolk are remarkably tolerant of our misfit group, with the goblin attacks in the not too distant history of the town, seeing one amongst them might spark a panic.  So we stop off at Sandru's caravan on the outskirts.


Bukka talks Sandru into letting Kapo stay at the caravan and not killing her.  Shadow agrees to stay behind to keep an eye on her and make sure she doesn't cause any trouble.

The rest of us head into town to let the Sheriff know what's happened while we were away.  First we drop off the ears and the head of the goblin chief and collect our bounty.  Then we track down the Sheriff himself.


We tell him about the Soggy River Monster, and the human heads we found.  Sula shows him her drawings to see if he recognizes any of the faces.  He doesn't seem impressed, but we manage to convince him that we aren't just screwing with him and that we did actually find the heads.  We tell him that we've marked the trail to the hut, and that anyone who goes to check it out should expect no trouble from goblins or the monster, as we've dealt with all of that.  He thanks us for the info and gives us a small reward.

Next we stop at the Rusty Dragon to mention some of the coincidental stuff we've found to Ameiko.  We tell her about the boats that shared her name, and we show her the letter.


She seems confused by the whole thing.  He father never spoke to her about her grandfather, and he had never mentioned anything about Brinewall Castle to her.  They moved to Sandpoint after he'd had an affair, and he didn't like to discuss it.  She seems genuinely somewhat distressed.  She says that we've given her a lot to think about, and that she's going to head home.  We're welcome to stay for dinner, and it'll be on the house.  We take her up on that offer.

After we eat, we head back to the caravan to check on things.  Sandru seems quite pleased with himself and in a good mood.  It turns out he's traded Kapo some nearly worthless, but pretty, glass beads, and in exchange he's got her scrubbing up the caravan for him.  We brought doggie bags from The Rusty Dragon for Sandru, Shadow, and Kapo.  Kapo devours it.  We realize this is probably the best food it's ever eaten.

We spend the rest of the night around the campfire with the caravan and decide to get some sleep there.

Sunday 11 January 2015

Session 5 - Whispering Shrike

After defeating the amoeba, we head down another corridor.  The cave widens out slightly into a larger sort of cavern with a pool of water on one side.  Lying around the water are a bunch of human skeletons wearing Tien style armor.  We notice that there's footprints on the floor of the cave, and each set of prints seems to end around a skeleton.  Shadow approaches one of the skeletons and starts to take the armor off of it.  While she's doing that, Qunna starts to put one of the skeletons in a net, so that we can attempt to get some information from it if they come to life like the ones near the Kaijitsu Blossom did.  Sure enough, as Qunna's netting one, they all start to come to life and attack us.


Qunna does manage to net one of them during combat, but all it really does is scream and clack it's jaws at us, so we knock it out.  Armed with the knowledge that blunt weapons hurt skeletons more, we're a little more effective at knocking them out, although we've still got to make do with the weapons that we have.  Sula punches one apart, Shadow kills one with a shovel, Bukka bites one into pieces.

One of the skeletons in particular seems to be more important than the others.  He rises slightly after the first group, and starts giving commands to the remaining skeletons.  That makes things a little more difficult for us, but eventually we dispatch all the skeletons.


We investigate the head skeleton.  There were two interesting things that he was carrying, a bronze key, and a magical sword that's Tien in style.


We spend a bit of time investigating the sword, and we find a small mithral compartment in the hilt.  Once we manage to open it, we find that it contains a small rolled up letter dated from 25 years ago.


The most surprising thing about it is that the name signed to it is another Kaijitsu.  We're going to have to see what Ameiko might be able to tell us about this.

Further around the corner into the cavern, we find another ornate Tien looking chest.  It's locked.  We try the key from the lead skeleton, and it works!


The chest contains a few potions, a wand, more fireworks, some fancy jewellery, a stash of money, and some adventuring gear.

Looking around, we seem to have reached the extent of the cave.  There's no more tunnels or passages that we can see.  So we decide to gather up what we've found and row back to town to share some of our findings.

Sunday 30 November 2014

Session 4 - The Kaitjitsu Blossom

We all climb aboard the rowboat behind Megus' shack, and start to row towards the point on the map where we've been pointed out to find the second shipwreck.


We approach the wreck.  It's far more intact than the other one, this one doesn't seem to have been burned.  However, it's still clearly been here for quite some time and is clearly very dilapidated.


The boat also appears to be Tien in origin, same as the Kaijitsu Star.  As we approach the boat, a few skeletons assemble from bits and pieces in the mud and shamble towards us.


We beat them up until they stay down.  As we're searching the leftover bone piles we notice that the ones that look the most dead were the ones that Sula knocked out with her Quarterstaff, and all of our slashing type weapons seem to have mostly just glanced off of the bones without causing as much damage.

The nameplate on the ship reads "Kaijitsu Blossom".  It's a little bit bigger than the Kaijitsu Star.  We search it all over, but there's nothing of value left.  It's clearly been here for quite a long time and been looted pretty well by now.

So we leave, and row the boat towards the location of the cave on the maps.  We row up a small river and search around.  Eventually we find the entrance to the cave.  It's overgrown with vines, although they appear to have been recently disturbed somewhat.


We can't see any footprints, but we think someone's been through here fairly recently.  We start to head through.  Qunna makes it through no problem.  Shadow touches the vines and discovers that they're stinging nettles.  Bukka fixes up the stings, and we cut down the vines from the entrance before the rest of us enter.

The inside of the cave is wet, algae grows on the walls.  The only sound in the cave is the sound of running water over the cave floor.  There's a small stream twisting through the various rooms of the cave.  We walk into one of the rooms, and wade through some of the water.  It's about three feet deep.

As we round a bend a giant spider scuttles out of a corner and rears up at us.  In the corner is the body of a huge gecko that the spider was eating.  The spider tries really hard to eat us, but we don't let it. 


Once we've dealt with that we keep exploring.  There's several forks in the cave, and we manage to determine that a few of them are connected to each other.  One of the forks we explore leads to a dead end with a bit of a deeper pool of water in it.  Bukka casts light on a rock from the cave floor and we throw it down into the pool.  We can see something sparkling down at the bottom of the pool.

We discuss the best way to get it, as nobody really thinks that getting into the water might be the best idea.  While we're all squabbling over how best to retrieve the sparkly thing, Shadow sneaks away from the group and dives into the water to retrieve it.  As she's swimming to the bottom she's slammed by a giant amoeba.


After we dispatch the amoeba, we dive down again and retrieve the sparkly objects.


As it turns out, they're gemstones.  None of us is exactly sure what they are, but we all think they're probably worth at least some money, so we take them with us.

Sunday 9 November 2014

Session 3 - The Witch's Walk

After defeating the goblin chief, we head back into the store room to have a real look through the contents of the fancy chest.  There's a bunch of stuff in there, but the one thing that draws our eyes the most is a fancy paper fan with a map scrawled on the back.


After reviewing the map for a while, we think it's a map of the swamp.  It's got a few places marked on it that we've been, and a few that we're going to check out, including another boat wreck.

We gather up the rest of our stuff and carry on searching the rest of the camp.  We search through a bunch of empty filthy goblin houses and another guard tower.  Shadow sneaks into the next building ahead of us and finds that there's a single goblin left in there.  It's the same one that we beat up earlier who ran away.  It's squabbling over some things it's trying to pack up, and while it isn't paying attention, Qunna catches it in her net so we can ask it some questions.


  • What's up with all the burned bodies in the pit?
    • "The Big Boss took the chest from the cave, from the empties.  The empties came.  Like longshanks, but no meat!"  We all know that longshanks is the goblin word for humans and other tall folks.
  • What about the bodies in the moat?
    • He seems proud as he explains that the goblins killed some of the empties.  "Not helpless!  Did it all myself!"
  • Did the empties burn the house?
    • "No!  Scribbles used words!  Words take souls!"  He explains that the goblins burned that house on their own.
  • Do you know about Megus?
    • "Don't go there!  She catches goblins...  Changes them...  Not good.  Not good."  He seems genuinely a bit afraid.
  • Did the longshank empties come from the witch?
    • "No, from the cave.  Nice chest!  But empties didn't like us taking it."
  • Where is the cave?
    • "Down."  Helpful.
  • How did some of you survive when the empties attacked?
    • "The empties just left."
We show him the map on the fan.  He points to a shipwreck and tells us that that's where the fireworks came from.  It's not the one we've already visited, it's a bit further into the swamp.  He also points to where the empties cave is.  Since he was actually helpful, we decide to let him go.  Qunna flings him over the fence and we hear him scamper off into the woods.

The last room in the building are an empty storeroom full of rusty tools.  We come across another guard tower and a couple more empty houses.  One is a little fancier than the others and has only a single bed in it as opposed to the rows of bunks we've seen in the other houses.  Nothing worth noting stands out to us in any of the houses though.


We decide that rather than head back to town now we're going to keep pushing ahead into the swamp and investigate the last few points of interest that we've got to take a look at.  But the day is drawing to a close, so we think it would be wise to sleep here instead of exploring the swamp at night.

The Chief's hall seems to be the sturdiest building of the lot, so we head there, clean up some of the battle gore, barricade the doors, and sleep for the night.


In the morning we talk through our plan.  We're going to check out the second boat wreck that the goblin claims is where they found the fireworks first, then try to find Megus and see if she can tell us anything.

We head out of the goblin village, and as we're leaving, we notice that there's a path broken through the swamp.  What's strange is that it's taller than a path that would have been left by a goblin.  We think maybe the empties probably left it.  We decide to follow it and see where it leads us.  We come to a narrow place in a small river probably about 50 feet across.  We swim to the other side.

We pick up the trail again, lose it for a minute, find it again, and follow it to the end.  It opens up into a proper walking path.  Based on where we are, we think heading left will lead us out of the swamp, and heading right should lead to the shore.  We head right.

After a few minutes we pop out at a weathered looking shack with an outbuilding. 


We approach the outbuilding first.  It's very run down.  The door is swollen shut from the wet swamp air, and the walls a broken up in several places.  Peering in, we can see that it's just a storage shed, there's some gardening tools and supplies, but most interestingly, there's three dire rats who jump out and attack us.


We fight the rats for a while and eventually fend them off.  We get in the shed and look closer, but all we find is rat droppings and rat prints.  There's some other prints mixed in, they look like they were made by tiny human hands.  We aren't really sure what to make of them.  They aren't doing anything particularly interesting, just wandering around, but it's still pretty strange.

We head over to the house, and peek in some windows.  Someone thinks they see a small flash of movement, but nobody can pin down anything specific.  We knock on the door, but nobody answers.  This door is also swollen and stuck, so Sula kicks it in.

The inside of the house is overgrown with fungus.  It's growing on the walls and the floors.  Everything is damp and humid and gross.  There's a usable broom in one corner, but otherwise, nothing special.  We find what at one point would have been a bedroom.  There's some bookshelves, but all the books are moldy, and we don't really want to take any of them.  We also find a porch, a toilet, and a kitchen.  All of which are covered in fungus.  As we're poking around in the kitchen, a rat with a human face runs in from a hole in the wall yelling "Intruders!"  It attacks us.


We fight with it for a while, and it runs into another hole in the wall on the other side of the room.  We think it's run off, but it pops out behind us and attacks again.  We eventually manage to kill the monstrosity.  Sula looks into the wall where it was popping in and out, but there's nothing special about it, it's just a hole in a wall.

We move past the kitchen and find what looks like it could best be described as a lab.  There's a workbench with chemical stains and crystalline growths on it.   And in a chair in front of the bench is a totally bizarre looking skeleton. 


The skull is half melted, one arm has talons, and there's huge spurs of bones protruding from the ribs, both inward and outward.  It looks like some kind of horrible experiment gone wrong.

In the lab we find another map of the swamp, this one more proper.  We finally put two and two together and realize that we've found the witches hut, and Megus is no longer around to ask questions of.  As we leave we set off a firework in the house to burn away the filth and hopefully deter other vermin from gathering in the area.

We set off to find the other shipwreck, and as we're leaving, we notice that there's a path leading from the house to the shore.  Down by the shore we find a small pier with a well maintained rowboat big enough to seat the four of us.  As Megus won't be needing it anymore, we decide to take it to get over to the other shipwreck.

Sunday 26 October 2014

Session 2 - Brinestump Marsh

While Walthus fixes us a bit of lunch, we discuss our plans.  We figure it would be best to start by checking out the area where the smoke appeared prior to the goblins getting rowdy.  Then head up to the goblin camp.  We can track down old Megus once we're done with the goblins.

Walthus agrees to ferry us across the river in his boat.  Once he has us all across, he explains that in order to reach the smoke, we just need to follow the coastline.  He also gives us general directions on how to find the Licktoad village, and the Witch's Walk.  So we set off walking towards the direction of the smoke.


We eventually reach what appears to be the burned up remains of a sailing ship.  It's pretty destroyed to hard to say for sure, but it was pretty clearly a large ocean going vessel.  We do find the nameplate and we're able to discern that the name of the boat was "The Kaijitsu Star".  That's Ameiko's last name as well, which is an interesting tidbit.  We search it, but it's been pretty thoroughly looted and burned.


We take a look around, and we see some fairly old goblin footprints.  Looks like 4 distinct sets to us.  They head up the river, in the direction where we're pretty sure the goblin camp is.  So, we start following them.

Eventually, we reach what appears to be a big fence, about 10 feet tall.  Shadow climbs up and stealthily peeks her head out to take a look.  It's a series of buildings set about 5 feet up off the ground, connected by a series of catwalks.


There's no activity to be seen, but there does seem to be a pit with what looks like some burnt up bodies in it, and a pool of water with some disturbances in the dirt around it.

We take a quick walk around the fence and find an open gate.  From the gate, we can see better into both the pit and the pool of water.  The pit seems to be full of burned up goblin bodies.  The pool seems to have human sized bones littered into it.  The bones are very well cleaned, and there only seems to be enough here to account for a few people at most.

Shadow takes a quick lap of the camp sneakily staying under the catwalks.  Nothing seems to be happening, nobody seems to be there.  So we go in and have a look at the pit, aiming to find us some goblin ears for the bounty.  As we're starting to rummage, there's a shout and several goblins come running out of one of the buildings.


They're foul little creatures, but they seem to be pretty afraid, despite the fact that they're attacking us.  Qunna captures one in her net temporarily and asks it why it's so afraid.  It manages to string together "All will die!  The Empties are coming!  They'll kill everyone!"  We aren't sure what that means exactly, but he doesn't provide any other useful information.  As he's screaming, more goblins come out of another building.

All said and done, we gather 10 fresh goblin ears, and one goblin gets away and runs back into a building.  We then scavenge another 3 slightly charred ears from the pit.

So, knowing there's at least one more goblin mucking about, we take a look around.  One of the closest buildings is a guard tower about 5 feet taller than the remaining buildings, so Shadow sneaks up to have a look around.  She notices a goblin running along a catwalk towards the rear of the camp.

We decide that's not really a threat, so we take a quick look at the building the goblins initially came out of.  There's nothing valuable in there, it's mostly just a dirty goblin home with a bunch of filthly little beds.

Moving on, we find the burned up remains of an old building.  It doesn't seem to have been burned any time recently, and we aren't sure why it would have been.  We climb up onto the nearby catwalk and look into another building.  It's another goblin house, nothing remarkable and reasonably dirty.

The catwalk behind this house leads to a more fortified looking building.  Slightly bigger than the rest, and with strong looking doors.  We try them, but they seem to be barred from the inside.  Shadow remembers from her sneak about that there was a ladder that lead up to the rear of the building, so we go around back and have a look.  Sure enough, there's a very poorly hidden door.

We all go inside and find a very ornate looking chest.  We have a quick check for traps.   Nobody sees any, so we pop open the lid.


As the lid opens, it tips back and thuds against the nearby wall.  Suddenly, we hear a goblin voice shout out "What was that?!  Check the treasure!"  Then the door opens suddenly and we're in combat with goblins again.  One of these ones is more interesting than the others, he seems to be wearing a crown made of spikes, and he's holding a longbow.


As it turns out, one of the other goblins has fireworks, which he aims at us and sets off.  We manage to put the firework out, and exchange blows with the goblins for a while.  Eventually the only one who remains is the one in the crown, and Qunna finishes him off with a massive blow.  We take his stuff.


We surmise that this was the goblin chief, and we take his head so we can take it back for the Sheriff's bounty.